Windows) -> (
 Timeline)
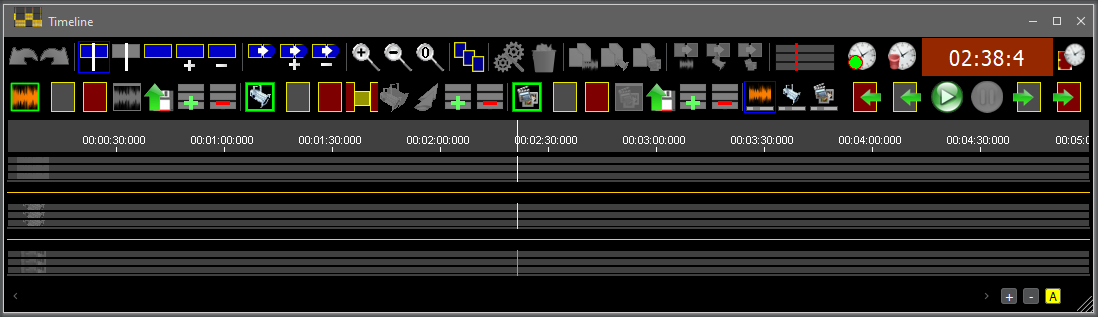
Timeline is the heart of the application. It is used to arrange sound, light and media.
SurfaceObjects
Undo
Working with Objects
Selecting Objects
Delete, copy and move selected Objects
The Editimode- during the running Show
Arranging Objects
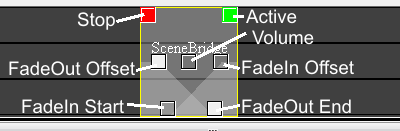
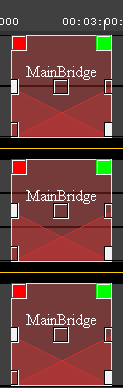
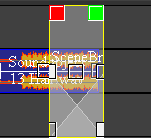
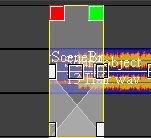
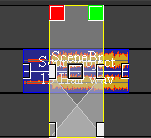
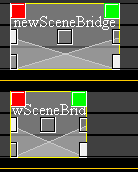
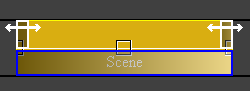
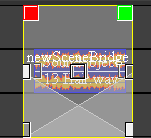
The special objects: Szene transitions (Scenebridges)
Main Scene transition
Important rules for Scene transitions
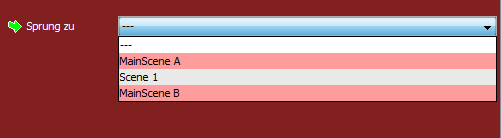
Programatic jumps (Loops,..)
Supplement: Explanantion of the toolbars sound. light and media
Changing the recorded time
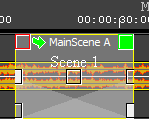
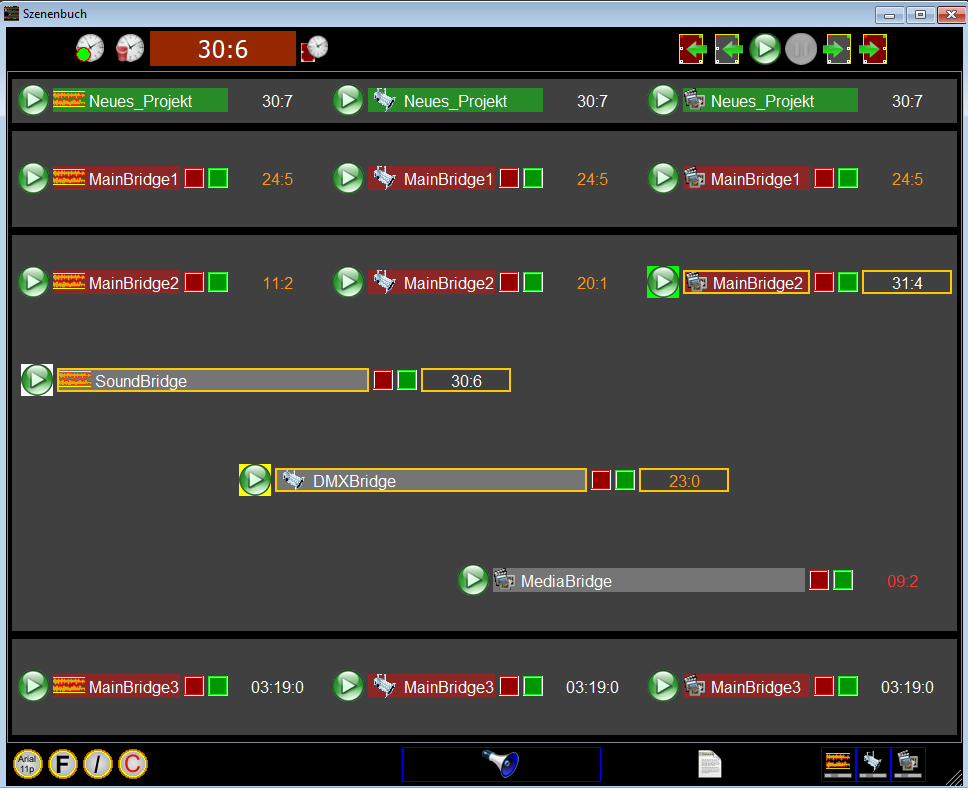
Scene transitions and the scene book
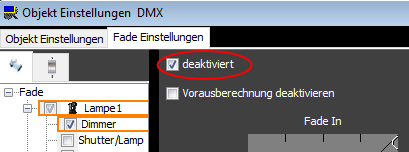
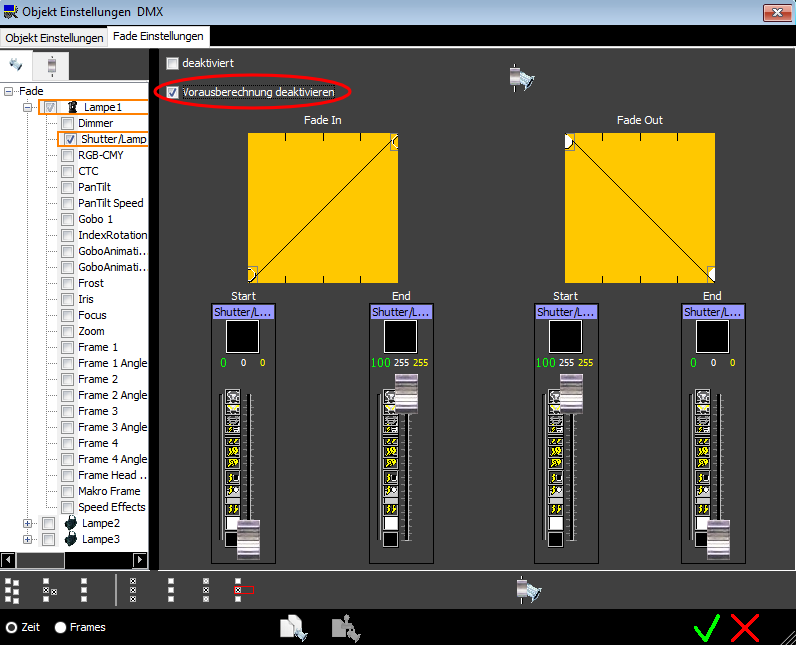
Precalcultion of light scenesWorking with Objects
Selecting Objects
Delete, copy and move selected Objects
The Editimode- during the running Show
Arranging Objects
The special objects: Szene transitions (Scenebridges)
Main Scene transition
Important rules for Scene transitions
Programatic jumps (Loops,..)
Supplement: Explanantion of the toolbars sound. light and media
Changing the recorded time
Scene transitions and the scene book
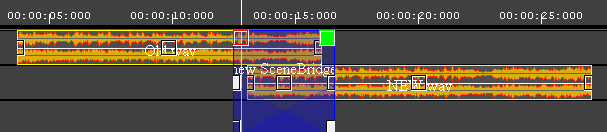
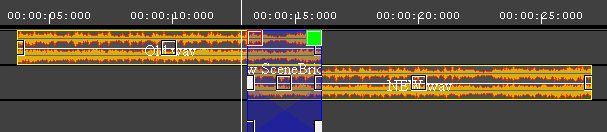
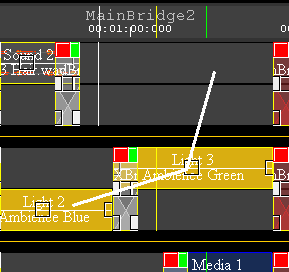
 The Timeline consists of three areas, each with several tracks:
in the upper section, music pieces can be arranged,
in the middle range light ambiences can be arranged
and media (pictures / videos) can be arranged in the lower area.
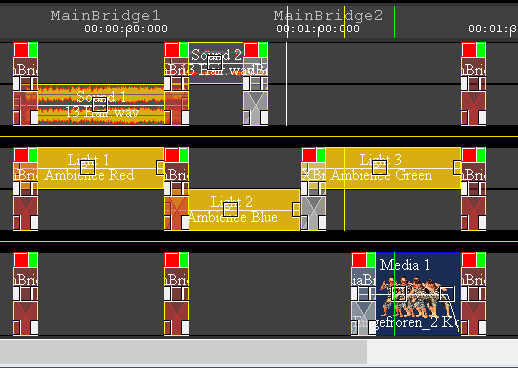
Sound data, lighting moods and media data can be added to the three areas, which can then be arranged in the Timeline as independent objects. A project is divided by scene transitions (scene bridges) which have a special functionality - see below.
The three sections of the Timeline can be played independently. Main scene transitions allow a synchronous start of a scene.
There are different data sources for sound, light and media. For sound, these can be areas from a sound file; in the case of light, these are stored light scenes. For media, these are areas from a video, image or text file.
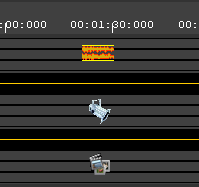
When data from a source is dragged into the timeline, an object (sound light or media object) is created.
The objects are represented in the timeline and are independent of each other. That is, Fade settings etc. are set and stored for each object, even if the different objects have the same sources.
Creating sound, light and media objects
In the upper area you can drag in the music with the mouse (Sound file view). This creates a sound object in the timeline.
In the middle area, you can drag a light ambience with the mouse (DMX Light ambiences). A light object is then generated from the light ambience.
In the lower area, you can drag sections of a video or an image (Medien file view). A media object is then created from the video / image. In addition, triggers can be dragged from the trigger view into a media track.

Tutorial Sound
Tutorial DMX
Tutorial Media
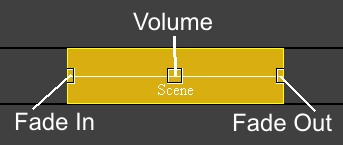
Sound, light, and media objects are displayed in rectangular areas. Sound objects represent their contents as envelope curves, light objects are simply filled with yellow and media objects show the initial image, the middle image and the final image of a video area, or an image / text three times.
The data source is displayed in the lower part of the objects. For sound and media objects, this is the filename and for light objects, this is the name of the light ambience.
Each object can be assigned its own name (object settings), which is displayed in the upper part.


Note: If you right-click on an object, a ToolTip window opens, in which certain properties of the object are displayed.
If you double-click on an object with the left mouse button, a window opens with the object settings.
If you click with the left mouse button in the lower half of an object, this object is selected - see below.
If you double-click on an object with the left mouse button, a window opens with the object settings.
If you click with the left mouse button in the lower half of an object, this object is selected - see below.
In addition there are editing cursors (shown in red) for sound light and for media, which can only be seen when the editing mode
 is activated.
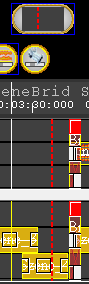
A PlayCursor can be set by:
+ clicking with the left mouse button in the time bar
 All play cursors are set to the same position.
+ moving the mouse to the left or right in the time bar with the left mouse button pressed. All playcursors move with.
+ clicking in the area of a track where no object is located (sound, light or media cursor). Here, only the corresponding play cursor is set.
+ clicking in the upper area of an object (mouse universal mode or playcursor mode - see "Selecting objects"). Here, only the corresponding play cursor is set.
The timeline is played using the play buttons in the Timeline toolbar
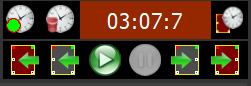
You can also play alternatively over:
- Scenbook
menu: ( Windows) -> ( Scenebook)
 - Play Control
menu: ( Windows) -> ( Play Control)
The remote control can also be adjusted via a wireless mouse. - Remote remote control via Android device
menu: ( Settings) -> (
 RemoteSettings)
There is a scroll bar in the bottom section of the Timeline.

 |
Increases the vertical zoom factor |
 |
Decreases the vertical zoom factor |
 |
By clicking the button you can switch the automatic tracking of a PlayCursor on and off. The background and the text display the respective status:  Tracking is disabled Tracking is enabled Tracking is disabled Tracking is enabled By moving the
scroll bar, you have moved the visible area so far that the PlayCursor
is no longer visible - tracking is temporarily switched off. Click on to recapture the PlayCursor. By moving the
scroll bar, you have moved the visible area so far that the PlayCursor
is no longer visible - tracking is temporarily switched off. Click on to recapture the PlayCursor. |
 |
Change the window size |
 ,
,  - see Select and move Objects.
The automatic scrolling of the timeline
If the Timeline is not a complete project, and if a PlayCursor runs out of the Timeline area or if a jump to a scene transition occurs, the Timeline can be scrolled automatically.The automatic scrolling can be set using the following toolbar.
 |
The sound cursor is tracked |
 |
The light cursor is tracked |
 |
The media cursor is tracked |
Undo Redo
All changes in the timeline and the objects are recorded: |
The changes are reversed |
 |
The changes are restored |
Note: To save internal RAM space, the Undo is limited to the last 5 changes.
Working with Objects
A double-click on an object opens a window in which the properties of the object can be set. Depending on the object type there are additional settings. For media objects, e.g. you can set the media server on which the object is to be reproduced.Basic properties, (length, fade in / out, ..) can be set in the Timeline directly at the object.
Basically, objects can only be moved if they are selected - this prevents accidental movement.
SelectionThe objects are divided into invisible areas:
 With the white-bordered surfaces, the objects can be lengthened or shortened
If you are in the mouse universal mode
 , an object can be marked with the blue-bordered
area, the area between the white surfaces is used to set the
PlayCursor.
, an object can be marked with the blue-bordered
area, the area between the white surfaces is used to set the
PlayCursor.Objects can be selected in principle by clicking with the left mouse button in the lower part of an object.
You can add more objects to the selection by holding down the "Shift" or "Ctrl" keys.
If an object is located under a scene bridge (see below), the object under the scene bridge can be reached with the mouse by holding down the 'Alt' key (under MacOS: 'Option' key).
The mouse pointer then adjusts to the object below the Scenebridge.
There is a section in the toolbar where different selection modes can be set::

|
Universal mode: Click on the upper half of an object (between the white surfaces) to set the PlayCursor. Clicking in the lower half of an object (blue area) selects the object, the previous selection is deleted. If you press Shift or Strg/Ctrl, you can add more objects to the selection, or remove selected objects from the selection. If the 'Shift' and 'Alt' keys are pressed (underMacOS 'Shift' and 'Option' keys), there are two cases:
|
 |
Selecting objects is disabled, only the PlayCursor is set. |
 |
Setting the PlayCursor is switched off; only objects are selected. If you press Shift or Strg/Ctrl, you can add more objects to the selection, or remove selected objects from the selection. If the 'Shift' and 'Alt' keys are pressed (underMacOS 'Shift' and 'Option' keys), there are two cases:
|
 |
Individual objects are added to the selection |
 |
Individual objects are removed from the selection |
 |
All objects starting at the same position or later are selected. The previous selection is deleted. This selects all objects from the starting point of the clicked object to the end of the timeline. |
 |
All objects that have the same or higher starting position are added to the selection. |
 |
All objects that have the same or higher starting position are removed from the selection. |
One more way:
Move the mouse to a free area and hold down the left mouse button. If you now move the mouse over the objects, these are selected or removed from the selection:
the following rule applies:
- if the first object that you touch is not selected, this and all other objects are selected
- if the first obkect that you touch is selected, this and all other objects are removed from the selection
Further Buttons:
 |
Opens the window of the object groups. In a object group, a selection of the timeline can be saved and restored. This does not save the objects themselves, but only the selection made. |
|
Increases vertical zoom when you click in the Timeline Alternatively, you can also zoom with the mouse wheel. |
|
Reduces vertical zoom when you click in the Timeline Alternatively, you can also zoom with the mouse wheel. |
 |
Resets the zoom, the entire project is displayed |
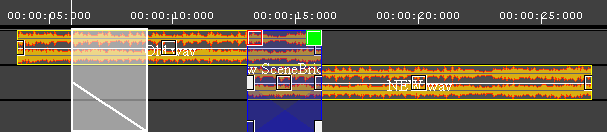
Delete, copy, and move selected objects
Move:
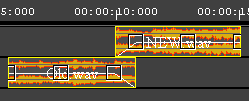
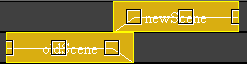
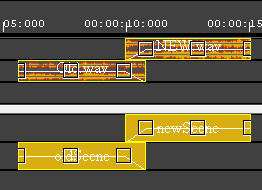
Objects must be marked (selected), then they can be moved by dragging them with the left mouse button pressed. The objects can also be dragged to another track.
Snap in
When moving, the beginning of an object always snaps to certain points of other objects:
Objects must be marked (selected), then they can be moved by dragging them with the left mouse button pressed. The objects can also be dragged to another track.
Snap in
When moving, the beginning of an object always snaps to certain points of other objects:
- Start and end of an object
- FadeIn and FadeOut of an object (so you can create clean crossfades)
When multiple objects are selected, always the object, which is moved will snap in.
The FadeIn fadeout handles also snap to the same points of other objects!
The FadeIn fadeout handles also snap to the same points of other objects!
Note: Snapping on other objects works across all three areas (sound, light and media)!
Deleting, copying and moving selected objects can be controlled by the following toolbar:

 |
If only one object is selected, the object settings of the selected object are opened. |
 |
Deletes all selected objects |
 |
Copies all selected objects The copies are inserted at the position of the sound cursor |
 |
Copies all selected objects The copies are inserted at the position of the light cursor |
 |
Copies all selected objects The copies are inserted at the position of the media cursor |
 |
Moves all selected objects to the location of the sound cursor |
 |
Moves all selected objects to the location of the light cursor |
 |
Moves all selected objects to the location of the media cursor |
|
Turns the Edit mode off and on - see below. In the editing mode during the running show, light ambiences etc. can be changed. |
The edit mode can be switched on and off using the button
.In order to be able to edit objects while playing a show without having to stop the running show or to have to move the actual PlayCursor, there are editing cursors which are displayed in red strokes in addition to the PlayCursor.
If the editing mode is activated, the editing cursors can be set like the play cursors. All object processing possibilities now refer to the editing cursors and no longer on play cursors. The times in the playback control are then shown in red and indicate the positions of the editing cursors.
Note Light Area and the edit mode:
The values, which are changed via the device faders / controllers, are no longer sent directly to the devices!
The controller settings can still be stored in the light ambiences.
In the view of the light ambiences, light can be obtained without sending the values to the devices, only the controller positions are changed. Thus, lighting ambiences can be changed during the running show!
All windows, which get a changed functionality through the editing mode are represented with a red frame!