Remote Settings
menu: ( Settings) -> (
 Remote Settings)
Settings) -> ( Remote Settings)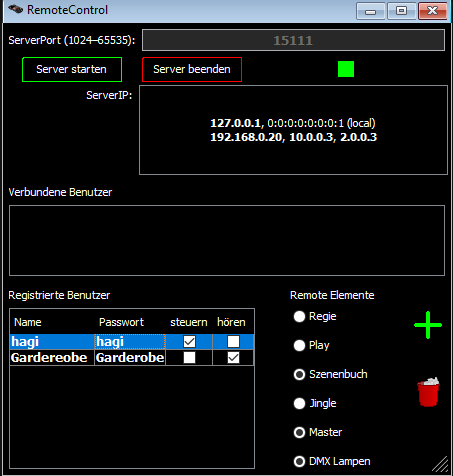 Settings) -> ( Remote Settings) <->

 The control point on the right should turn green.
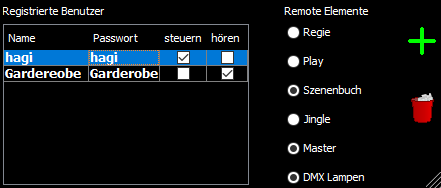
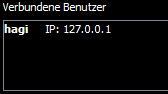
 A new user is created and this is displayed in the table.
 This button will delete a selected user from the table. If the user is connected, his connection is disconnected.
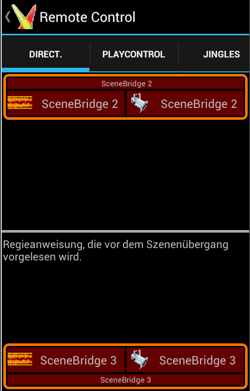
 If "control" is selected, the user can control the program via the remote control.
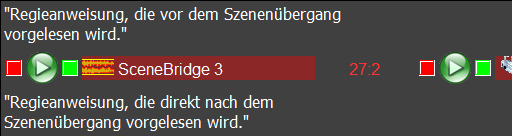
 If "listen" is selected, the scene changes and the directional instructions are read to the user.
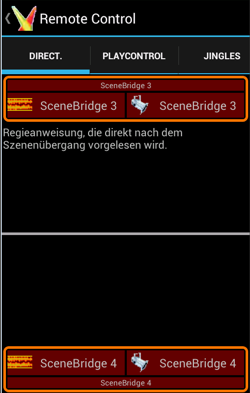
| Direction | the director's texts for the current scene are displayed |
| Play | here you can jump to the next/previous scene |
| Scenebook | the scene book is displayed on the remote control and scenes can be started |
| Jingle | all jingle and jingle groups are displayed and can be started |
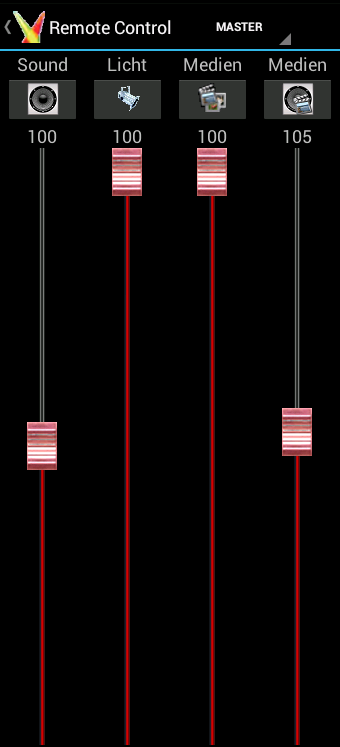
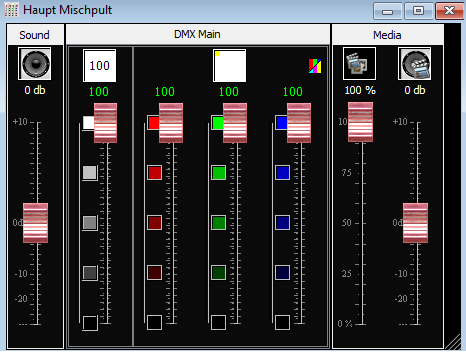
| Master | The main controls for volume / brightness,... are displayed and can be changed |
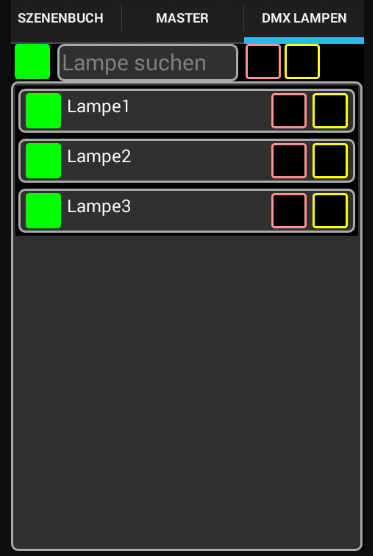
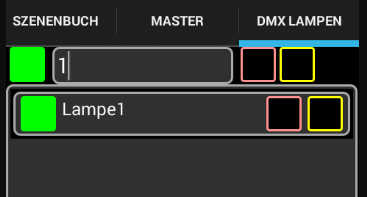
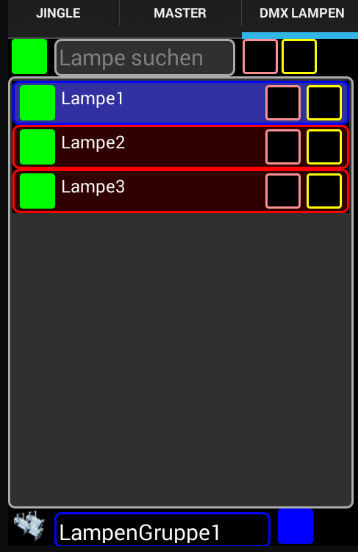
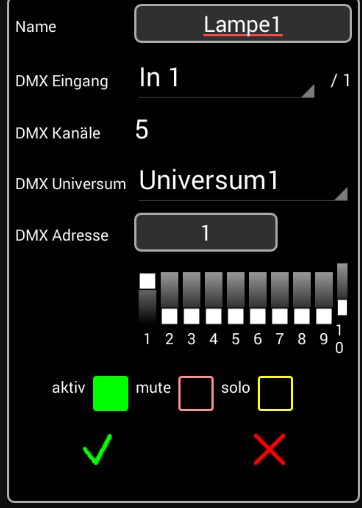
| DMX lamps | This is used to set up the DMX lamps. All lamps are displayed and can be changed. |
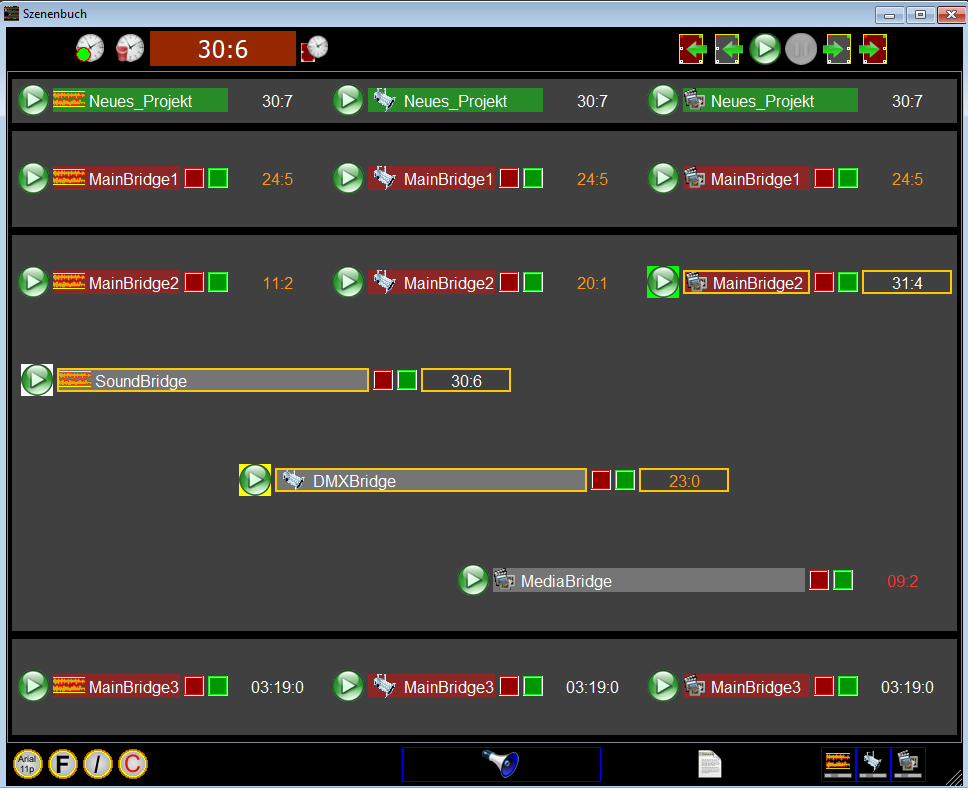
 An orange box indicates that the server is not started.
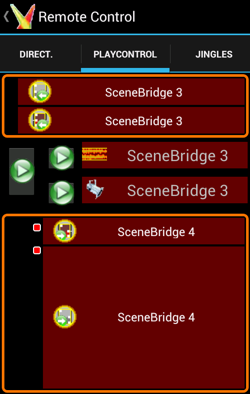
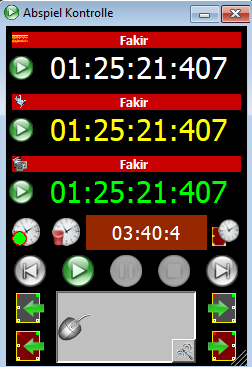
 ) before the next scene transition
shows you whether the stopper is set or not (if the point is filled in
red, the stopover of the scene transition is set and the play cursor
will stop automatically before the scene transition).
) before the next scene transition
shows you whether the stopper is set or not (if the point is filled in
red, the stopover of the scene transition is set and the play cursor
will stop automatically before the scene transition).| green frame | More than 30 seconds to the next scene transition |
| orange frame | Max. 30 seconds to the next scene transition |
| red frame | Max. 10 seconds to the next scene transition |
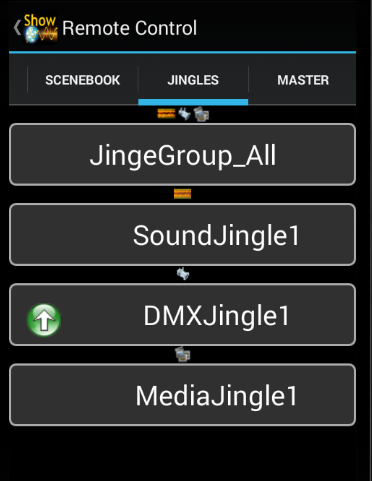

| All jingle groups are listed here - see JingleWindowr To start a jingle group simply tap on the name of the jingle group. To stop a running jingle group directly tap the name of the jingle group again. Jingle groups have two additional buttons:  FadeIn: the jingle group is faded in.when the last jingle of the Jinglegroup is fadet in, all jingles of the group are paused. FadeIn: the jingle group is faded in.when the last jingle of the Jinglegroup is fadet in, all jingles of the group are paused. The paused jingles of the jingle group are restarted and play through to the end. The paused jingles of the jingle group are restarted and play through to the end. FadeOut: All jingles of the jingle group will be faded out directly,
they will not play through to the end but will be faded out immediately
as specified in their settings.
FadeOut: All jingles of the jingle group will be faded out directly,
they will not play through to the end but will be faded out immediately
as specified in their settings.Note: Depending on the purpose of a jingle group, it makes sense to start and stop it in different ways:
|
|
| All sound jingles are listed here. To start or stop a sound jingle simply tap on the name of the sound jingle. Sound jingles have one additional button, if the jingle is started. The sound is fadet out. |
|
| All DMX/light jingle are listed here. To start or stop a sound jingle simply tap on the name of the DMX jingle. DMX Jingle have two additional buttons: FadeIn: the light is faded in and then paused. FadeOut: the light is faded out. |
|
| All media/trigger jingle are listed here. To start or stop a sound jingle simply tap on the name of the media jingle. Media jingles have one additional button, if the jingle is started. The media is fadet out. |
.


| white frame | The play cursor has been paused. |
| green frame | The Playcursor is running |
| orange frame | The playcursor is running and it is max. 30 seconds to the next scene transition |
| red frame | The playcursor is running and it is max. 10 seconds to the next scene transition |
 |
The stopper before a scene transition is set |
 |
The scene transition is active |
 |
A jump is defined and active |

| "statement" | The statement is transferred to all, since no user is named here. |
| "user1#statement" | The statement is only transferred to user1. |
| "user2#statement" | The statement is only transferred to user2. |
| "user#statement" | The statement is passed to both users. This allows user groups to be created implicitly by entering the group name in the user name. Excample: WardrobeLadies und WardrobeGentlemen |
  |
By touching the symbol the lamp is deactivated/activated. If the lamp is deactivated, all DMX values are set to 0. |
  |
A lamp is muted by touching the symbol. For all muted lamps, 0 is transmitted for the dimmer channel. The lamps are off. |
  |
By touching the symbol a lamp is set to solo. For all lamps which are not set to solo, 0 is transmitted for the dimmer channel. All other lamps are off. |
 |
When you select a lamp group, the current selection is reset and all lamps in the lamp group are selected. |
 |
Tap the icon to reset the current selection. If no lamps are selected, all lamps are selected. |
 |
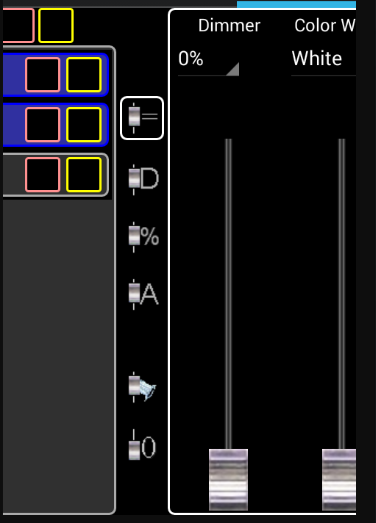
All at the same value If the controller is moved, the same value is set for all lamps. |
 |
Keep difference If the controller is moved and its values are at different values for the selected lamps, the distance between the values is maintained. |
 |
Percentage change For example, if the controller is moved by 10%, the values of the selected lamps are also changed by 10% of their current value. |
 |
Assimilate If the controller is moved to 100% or 0%, the values of the selected lamps are adjusted proportionally until they are also at 100% or 0%. In other words, the values meet at 100% or 0%. |
 |
All controllers of the selected lamps are set to their default values. These values are defined in the lamp type. |
 |
All controllers of the selected lamps are set to 0. |
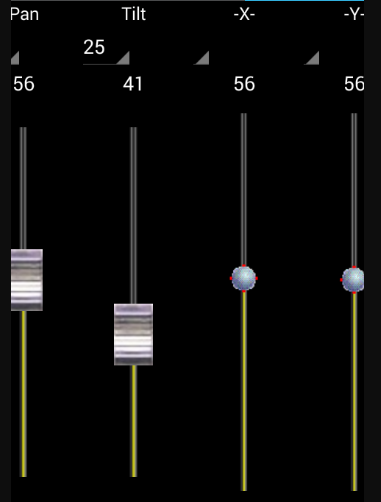
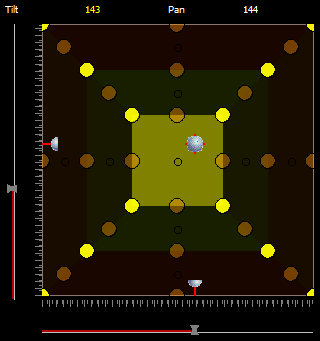
 and -Y- are displayed for calibrated movement.
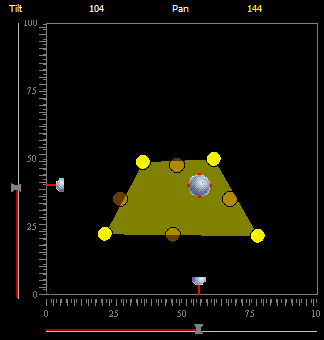
 |
Saves the changes. |
 |
Discards the changes. |