 DMX Light) -> (
 DMX Stage view) DMX Light) -> ( DMX Stage view)

 |
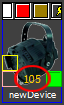
Add a lamp. A lamp selection window is opened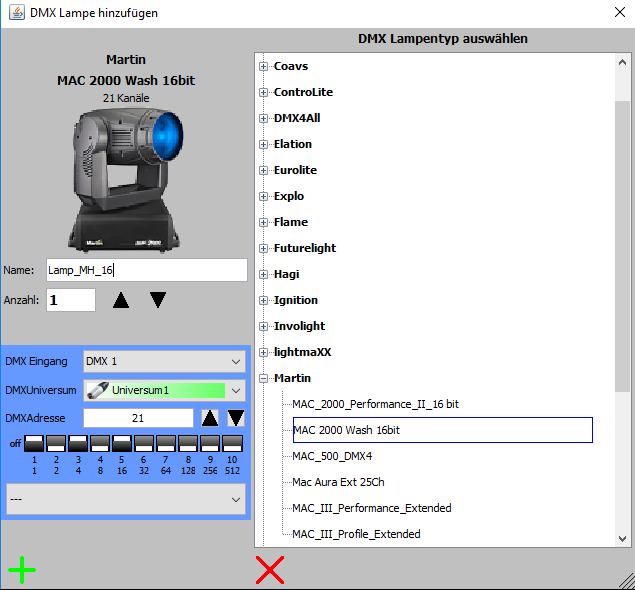 Lamp selection window |
 |
Opens the lamp properties window of the selected lamp - see properties of a lamp. |
 |
Opens the lamp tracking of all selected lamps - see Lamp tracking |
 |
Selects all objects in the timeline that use the selected lamps (with the selected lamps on). |
 |
Opens the window of the lamp groups. In a lamp group, a lamp selection can be saved and restored. This does not save the lamps themselves, but only the selection made. |
 |
Here the lamps can be filtered according to certain criteria - see lamp filter. |
 |
Deletes all selected lamps. |
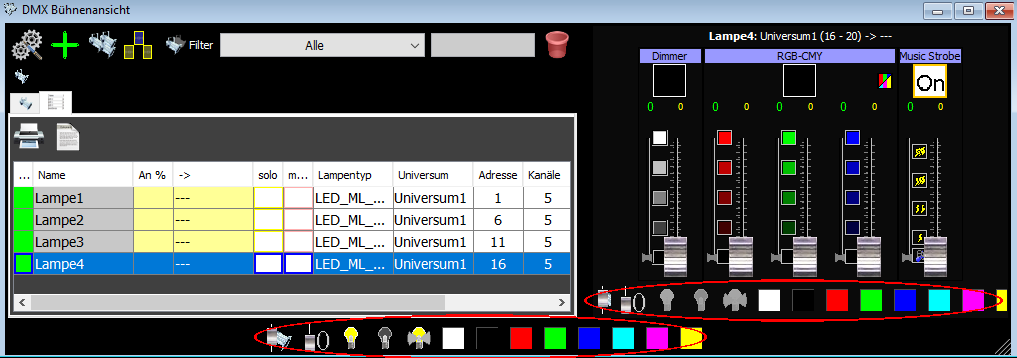
| Name | Here you can specify a lamp name. If you specify multiple lamps in the number, an index is automatically added to the name. The name can be changed later. |
| number | Here you can specify how many lamps of the selected type are to be added. Note: If you have specified a DMX universe, the next free DMX start address is automatically selected. If you add several lamps, the next free start address is determined, after which all new lamps can be addressed in sequence. If no free address is found, address 1 is used. However, you can specify a different start address at any time. |
|
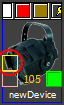
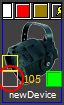
Adds the lamp (s) of the selected type to the stage view, and the settings such as name and DMX address are accepted. Note: If a lamp is added to the stage view, an identification for the lamp is generated internally (this is not visible). If a second lamp is added, it will have a different identification, even if the lamp has the same lamp type and perhaps the same name |
 |
Cancels the addition of a lamp. |


|
Deletes allselected lamps ATTENTION: The lamps are also removed from all light ambiences. |
 <-
<- 


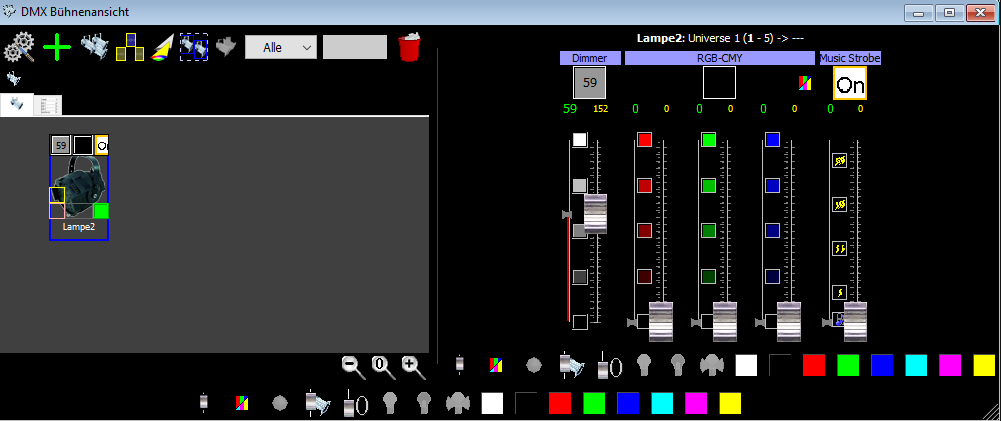
| Active | A lamp can be deactivated or activated (see also deactivation of a lamp) A deactivated lamp is displayed with a red box. |
||||||||||
| Name | Name of the lamp can be changed by double-clicking the tab cell. | ||||||||||
| Sektor | Some lamps
require more than one universe, such a lamp has several DMX inputs (a
DMX universe and a start address must be assigned to each input). This is determined by the lamp type (see DMX Device Editor) If a lamp has several DMX inputs, the lamp also appears several times in the table. Each DMX input is displayed in an extra line. This can not be changed here! |
||||||||||
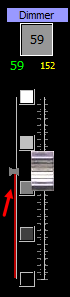
| On% | This column indicates whether the lamp is currently being used or not. The values can be changed.
|
||||||||||
| -> | Displays the name of the scene transition from which the lamp is reused. A "-" indicates that the lamp is not used until the end of the project. It may be that the lamp is currently being used (see "On"), but there is no further scene transition after which the lamp is again on. |
||||||||||
| solo | Here the lamp can be set to solo, see Solo function | ||||||||||
| mute | Here the lamp can be muted, see mute function | ||||||||||
| Universum | Displays the DMX universe. The universe can be changed, a click on the universe name opens a list of all existing universes. If there is an address conflict with other lamps, the name of the universe is displayed with a red frame for all affected lamps. |
||||||||||
| Adresse | Displays the starting address, this can also be changed by double-clicking the start address. If there are address conflicts with other lamps, the name of the universe is displayed with a red frame for all affected lamps. |
||||||||||
| Channels | Displays the number of channels that this lamp uses. | ||||||||||
| Manufacturer | Displays the manufacturer of the lamp | ||||||||||
| Lampentyp | Displays the lamp type | ||||||||||
| Stromquelle | The current source to which the lamp is connected is displayed. Clicking on the name of the current source opens a list of all current sources. If too many lamps are connected to a power source and the power (Watt) of the connected lamps exceeds the power of the current source, the name of the current source is displayed with a red frame. |
||||||||||
| Power | The maximum electrical power of the lamp is shown in watts. This is determined by the lamp definition and can not be changed here. |
 Export the list of lamps to an HTML file. (if only one lamp is selected) or by
double-clicking on a lamp, a window opens in which the properties of the
lamp (name, universe, start channel, etc.) can be set.
Export the list of lamps to an HTML file. (if only one lamp is selected) or by
double-clicking on a lamp, a window opens in which the properties of the
lamp (name, universe, start channel, etc.) can be set.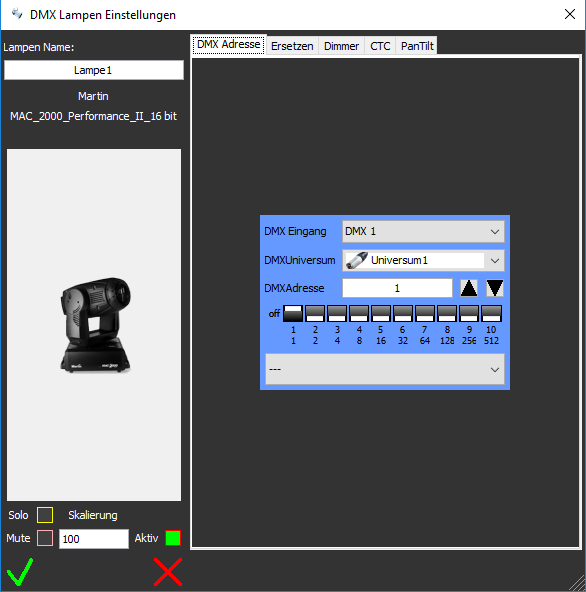
 inverts the selected lamp filter. If the inversion is activated, the button is displayed with a red frame.
 lamp filter in the list of filters, the filter for this lamp is automatically selected.
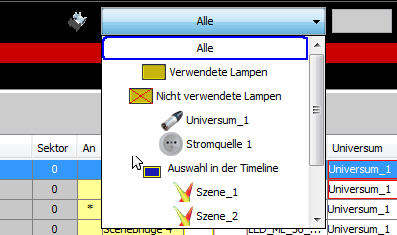
 | All | All lamps are displayed. |
 Lamps used Lamps used |
Only lamps are displayed which are used either in the timeline or in a jingle (dimmer value> 0). |
 Universe 'xxx' Universe 'xxx' |
Only lamps that are connected to the selected universe are displayed. (Whose sector is connected to the universe) The universe '---' does mean no universe, so only lamps that are not connected to any universe are displayed. |
 Current Source 'xxx' Current Source 'xxx' |
Only lamps that are connected to the selected current source are displayed. '---' does mean no source, so only lamps that are not connected to any current source are displayed. |
 Timeline Selection Timeline Selection |
If one or more light objects are selected in the Timeline, only lamps that are used in these light objects (dimmer value> 0) are displayed here. |
| Jingle Selection |
Only lamps are displayed which are used in the selected jingles. |
 Ambience 'xxx' Ambience 'xxx' |
Only lamps that are used in the selected light ambience (dimmer value> 0) are displayed. |
| Lamp Group Selection |
Only lamps used in the selected lamp groups are displayed. |
 Object Group Selection Object Group Selection |
Only lamos used in the selected object groups are displayed (dimmer value > 0). |
| Lamps 'xxx' |
Individual lamps can be selected. |
 Lamp type 'xxx' Lamp type 'xxx' |
Only lamps of the selected lamp type are displayed. |
which automatically opens the stage view and sets the lamp filter
accordingly.
opens a window in which all selected lamps and their use in lighting
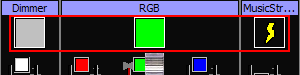
scenes or lighting objects are displayed, see Lamp tracking.. More specifically, all the objects in the timeline are selected in their light amboence, one of the selected lamps is on.| By simply clicking on the image of a lamp |
Only one lamp is selected.
The old selection is removed
|
| By simply clicking on the image of a lamp With the CTRL or Shift key pressed |
|
| When you press the mouse button outside of the lamp images And move the mouse over the lamps, with pressed maouse button. 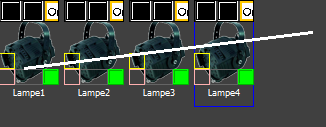 |
|
| Note: Double click on a lamp image |
The properties window of the lamp is opened. |
 |
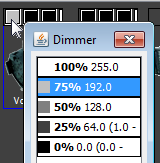
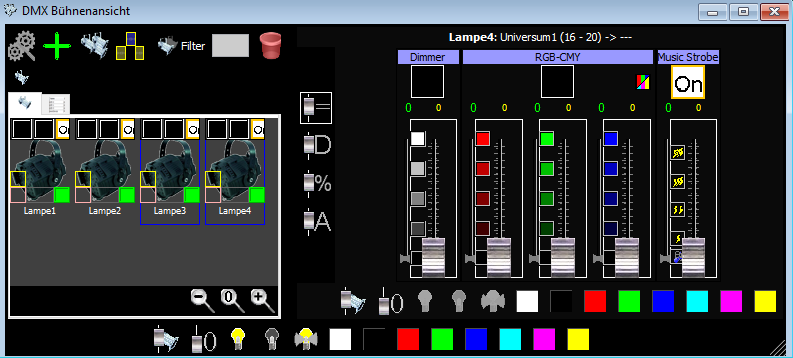
All controllers are set to the same value If you have selected several lamps and move, for example, the dimmer control, the dimmer controls of all other lamps are set to the same value. Note: for calibrated scanners or movingheads, you can switch the Pan / Tilt control to the virtual view, then all selected lamps are moved to the same point. |
 |
All controllers maintain their difference If the regulator of the first lamp is 50% and the regulator of a second lamp is 30% and the regulator is 10% higher, it is 60% for the first lamp and 40% for the second lamp. |
 |
All controllers are changed as a percentage If the regulator of the first lamp is 50% and the regulator of a second lamp is 30% and the regulator is 10% higher, it is 60% for the first lamp and 33% for the second lamp (by 10% Of its current value) |
 |
The controllers are adjusted upwards or downwards If the regulator of the first lamp is 50% and the regulator of a second lamp is 30%, and the regulator of the first lamp slowly moves to 100% or 0%, the regulator of the second lamp travels from 30% to 100% or to 0 % (The values are slowly adjusted) |
 |
Sets the selected lamps / all lamps to the default values, as defined in the lamps definiton (DMX Device Editor). |
 |
Zero all values of selected lamps / all lamps. |
 |
Lamp on / off for the selected lamps / all lamps, if this function has been defined in the lamp definition. This is especially the case with scanners / movingheads with discharge lamps. |
 |
Open shutter if this function has been defined in the lamp definition |
 |
Sets the corresponding color for the selected lamps / all lamps, if this function has been defined in the lamp definition. |
| Additionally there are the DMX preset buttons | |
 |
Opens a list of color presets. If a color preset is clicked
on, the colors of the lamps (selected lamps) will be adjusted as saved
in the color preset. All other lamp values are retained. If a lamp was not saved in the preset, it is not changed. |
 |
Opens a list of position presets. If a Position Preset is
clicked, the positions of the lamps (selected lamps) will be set as
stored in the Position Preset. All other lamp values are retained. If a lamp was not saved in the preset, it is not changed. |