 Settings) -> (
 DMX Device Editor)
 |
New lamp type If a lamp type is currently being processed, the changes are discarded and this lamp type is closed. |
 |
Load an existing lamp type. |
 |
Save and close the lamp type ATTENTION: The currently set controller values are stored as default values (see: The default controller values) Before you save a controller type, you should check all controller values and set them as you want them to be the default. With a scanner, shutter could be open on, for the color could be set white, .... |
 |
Discard changes and close the lamp type |
 |
Deletes the lamp type from the list of available lamp types. |
 |
Here you can import a lamp type or a whole number of lamp types. A created project is not saved in a file, but every aspect of a project is stored in its own file. Among other things, all lamp types used are also stored in a file "projektname.lsd". You can select such a file and import the included lamp types. If one of the lamp types already exists, it is not imported from the file. If a lamp type of the same name exists, you are asked if you want to overwrite the existing type. On the liveShow homepage, you will also find prefabricated lamp types, which you can download and import. |
 |
Handle for changing the window size |
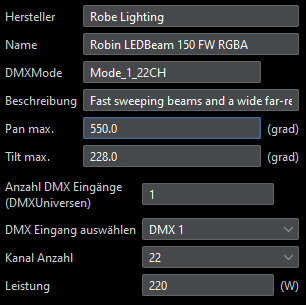
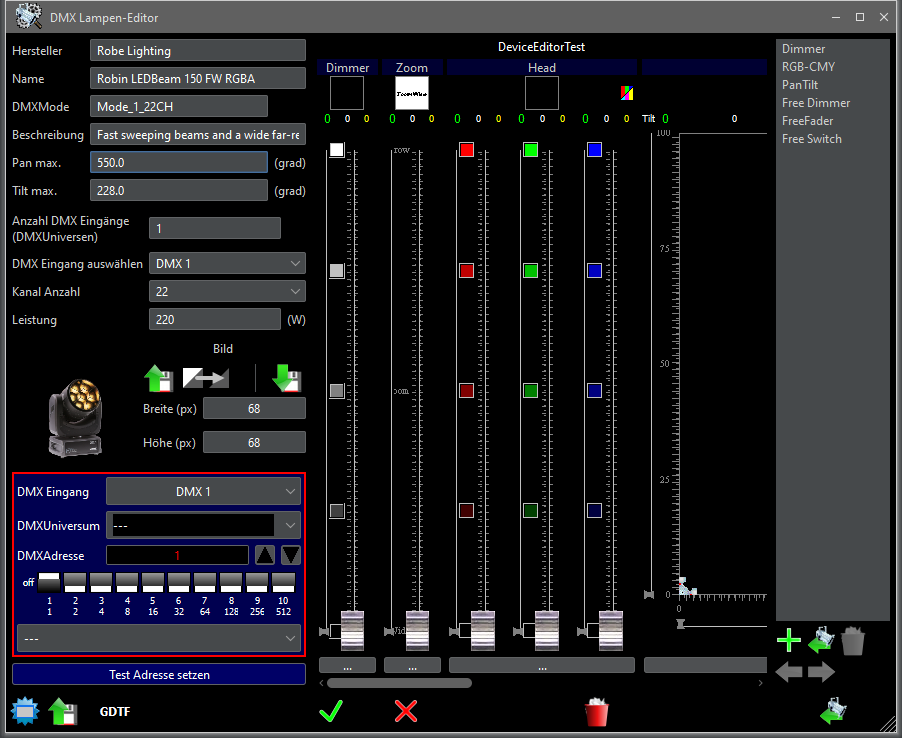
| manufacturer | Enter the name of the lamp manufacturer. Attention: This text is used to create the file name, do not use special characters / umlauts, but only letters and numbers! |
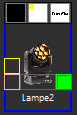
| Lamp name | Enter the name of the lamp here. Attention: This text is used to create the file name, do not use special characters / umlauts, but only letters and numbers! Some lamps allow multiple DMX modes. At the lamp you can set how many DMX channels should be used. If you want to create several lamp types of one lamp with different DMX modes, add the DMX mode used (e.g. _6CH) to the name of the lamp. Otherwise, it is best to choose a DMX mode which includes a main dimmer. |
| Lamp description | Optional: Here you can enter a short description of the lamp type |
| Pan max. only Scanner or Movinghheads |
For scanners or movingheads, you must enter the maximum horizontal (Pan) deflection in degrees. This information is important for the (Pan/Tilt calibration). |
| Tilt max. only für Scanner or Movinghheads |
For scanners or movingheads, you must enter the maximum vertical (tilt) deflection in degrees. This information is important for the (Pan/Tilt calibration). |
| Number of DMX inputs | Here you can set the number of DMX universes inputs that the lamp type has. Normally a lamp needs only one DMX universe with some DMX channels.. However, there are also lamps using more than 512 channels (e.g., LED matrix). Thus, the lamp also requires several DMX universes. That is, the lamp also has several DMX inputs. Or you have a composite lamp (Par + color wheel attachment). Later, if you add a concrete lamp of this type to the DMX stage view, you must also assign a DMX universe and start address to each of the DMX inputs! |
| Select DMX input | If the lamp requires several DMX universes, you can select here the DMX input (1 - xxx). All subsequent settings now refer to this DMX input / DMX universe. |
| number of channels | Here you specify how many channels the lamp needs for the selected DMX input. This can be found in the lamp manual. |
 ->
-> 
 |
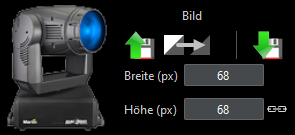
Opens a file selection window where you can select an image file. |
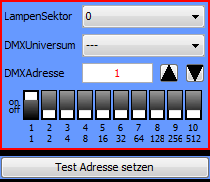
| DMX Input | Most DMX lamps require less than 512 DMX channels and therefore only one DMX universe. There are also lamps, which use more than 512 channels and thus several DMX universes. The lamp has several DMX inputs accordingly. Here you can select the DMX input. |
| DMX Universe | Here you assign a DMX universe to the DMX input (in most cases only one) - see DMX hardware settings. |
| DMXAddress | Here you assign a DMX start address to the DMX input |
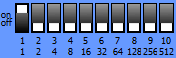 |
The start address is shown here as a DIP switch setting and can also be changed by clicking on a DIP switch. |
| Set the test address | Assigns the set DMX address (s) to the "DeviceEditorTest" lamp. If you have connected a lamp to your real DMX universe, the values are now sent. So you can try the functions right away while creating a lamp type. |
 in
the DMX stage view, these default values are set for the lamp.
in
the DMX stage view, these default values are set for the lamp.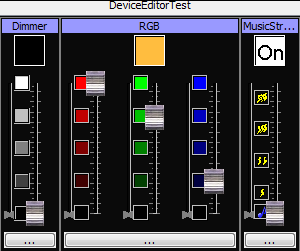
 |
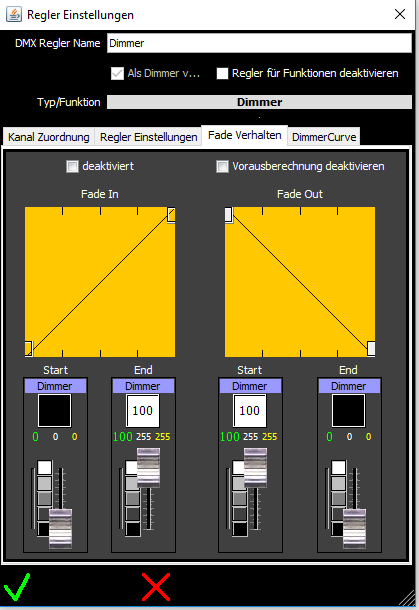
If you set
the checkbox "disabled", this control (channels) will not only play
along with the fade in/out, but will also turn off for the complete timeline
and the jingle window. The timeline will not change this channel. This allows you to set special channels (scanner lamp on / off) so that they can only be operated manually. Controllers that have been disabled are shown in the lamp view with a red frame around the quick selection!  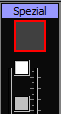 To allow these channels, which are disabled, to play in the timeline, you can remove the 'disabled' checkbox in the fade settings of the light objects (object settings). Otherwise it is with the fade behaviors of the light objects, here the setting of the hook would cause this controller to play only with the FadeInI/Out not, but after the FadeIn/Out or when setting the PlayCursor, the value changes. |