 |
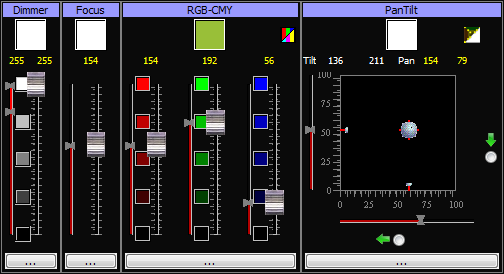
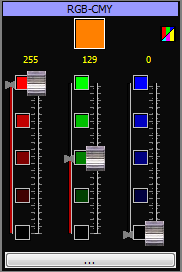
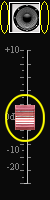
If a controller
is adjusted, the changed values are sent to the DMXUniversum, as a
feedback message, each controller has a "meter display" in the form of a
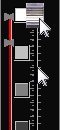
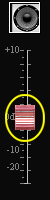
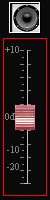
red bar. In this meter display, the transmitted
value of the corresponding controller channel of a lamp is displayed
with a gray double-square  . .Please note: If the controller is not connected to any lamp, there will be no feedback and the meter display will not change. Likewise, the meter display will not change if the controller is connected to a lamp, but it is not assigned to a DMX universe or the DMX universe is not assigned to a connected DMX Harware Interface! If you use dimmer curves, the meter display will not match the slider because the meters display the transmitted values. |
 |
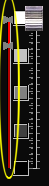
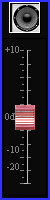
Use the left mouse button to move the slider up or down. If you drag with the mouse below or above the slider, the slider changes in smaller steps. You can also drag the mouse over the range of the slider. For one slider, this has no effect, it will stop at the highest or lowest position. If, however, several sliders are grouped or if you have selected several lamps in the stage view, the slider will also stop at the top or at the bottom, but the paired sliders are moved until they reach the minimum or maximum value. |
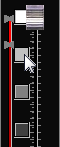 |
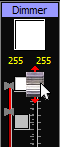
Use the mouse to click on one of the small squares to set this value. |
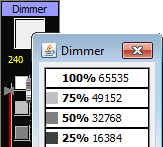 |
Click on the upper square with the mouse, a list opens in which you can select a specific value. |
 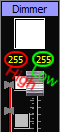 |
All controllers have a resolution of 2 bytes (value range 0-65535). The bytes are distinguished into a high-order byte (high or MSB) and a low-order byte (low or LSB). Some lamps have a high DMX resolution for some functions, they use 2 DMX channels (rough-high-MSB channel and fine-low-LSB channel) for this function. Correspondingly, you have the possibility to connect these two DMX channels with a high byte or the low byte of the controller. For functions of a lamp which have only a rough DMX resolution (1 byte = 1 DMX channel), the DMX channel is only connected with the high ((rough) byte. Simplified:: The high-order byte is for rough changes and the low-order byte is responsible for subtle changes. If only the high byte is connected - only one text box above the controller for the higher-order byte is displayed. If the high and low bytes are connected, two text boxes are displayed. Left for the high-order byte and right for the low-order byte. You can click the number with the mouse and then enter a different value. Pressing the return key takes this value. Alternatively, the percentage can be displayed, which is displayed in green. |
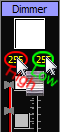  |
If you move the
mouse over one of the text boxes and rotate the mouse wheel, the values
of the high or low byte or the percentage value change correspondingly. This allows you to adjust the controller roughly or precisely. |
 |
If you move the
mouse over the area of the controller and rotate the mouse wheel, the
value of the low-order byte is always adjusted. Simplified: By moving the knob, you can roughly adjust the values, and turning the mouse wheel will fine-tune the values. |
 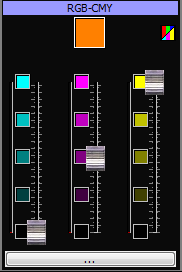 |
You can switch between RGB and CMY views by clicking on the symbol ( The individual color controls work as described above. Note: The RGB color model has an additive mixing behavior, that is, when all the controls are up, White is set. While the CMY color model has a subtractive mixing behavior, all the controls are at the top, so Black is set. |
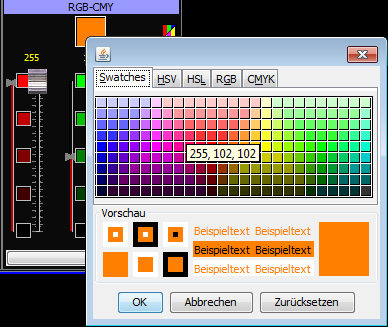 |
Clicking on the square above the color rules opens a color selection window. Here you can select a color and confirm with the OK button. |
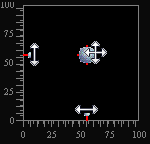 |
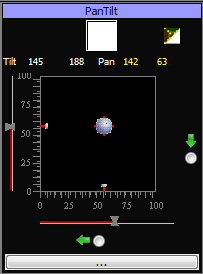
With the left mouse button pressed, you can move the position knob freely in the rectangle. Alternatively, they can move the horizontal position (Pan) at the lower edge and the vertical position (Tilt) at the left edge. Fine adjustment: If you hold down the left mouse button inside the rectangle next to the position button and move the mouse you can fine adjust the position. At the bottom right there is a text field, there you can set a value for the between 0.0 and 1.0. 1.0 = change corresponds to the mouse movement, 0.1 = change corresponds to a 10th of the mouse movement. |
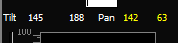 |
The Pan/Tilt element has a resolution of 2 bytes (High / Low) for each dimension (horizontal / vertical). As with the controls described above, you also have the option of changing the values textually, whereby two text boxes (High Byte / Low Byte) are available for both the Tilt and the Pan movement. However, if you have only connected the higher-value byte for pan and tilt to one lamp channel each for the pan/tilt element, only one text box will be displayed for pan and tilt. |
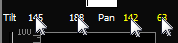 |
As with the controllers, the value of a text box can also be changed using the mouse wheel. A change in the left-hand text box (high-byte) causes a rough movement and a fine change is effected by changing the respective right-hand text box (low-byte). |
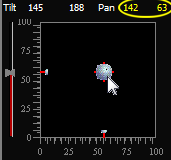 |
If the mouse is inside the rectangle, you can use the mouse wheel to make subtle changes. If Pan or Tilt is changed, you will see the yellow values. You can switch between pan and tilt movement by clicking on the position button. |
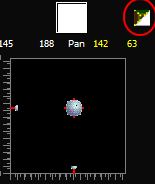 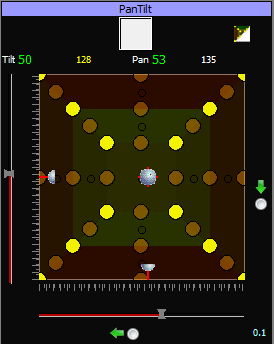 |
In the upper right, you can switch between the normal Pan / Tilt control and the calibrated control ( ). ).For the calibrated control to function, the scanner or moving head must also be calibrated - see calibration. |
 -->
-->
| Mouse-Clicks | |
| 2 | Controller is added to the group or removed when it is already in the group |
| 2x with pressed shift or control key | All controls are removed from the group - the group is then empty. |
 ->
-> 
| Maus-Clicks | |
| 1x | Controller is selected or the selection is removed if it is already selected. The selection of all other selected controllers is removed. |
| 1x with pressed shift or control key | Controller is additionally selected. |