Lamptracking

(Menu_DMX.pngDMX-Light) -> (Menu_DMX_StageView.pngDMX Stage view)

The window is visible by:


Here, lighting moods and object properties can be viewed and changed for the selected lamps.
This is a very powerful tool and should be used wisely.

In this window you have an overview of the use of selected lamps and you can copy discrete or as many lamp settings as possible from other lamps.

Memory :
In the lighting settings, all the values of all lamps are stored for a light ambience. The light 
ambiences serve as a source for the light objects in the Timeline.
If a light 
ambience is changed, this affects all light objects that use this light ambience as a source.
When a light is dragged with the mouse into the timeline, a new light object is created. Only in a light object can properties such as the fade in/out times, the suppression / deactivation of channels be set. These settings only affect one object.


There are two different tables for lamp tracking:
1.) Light ambience-Tracking
It shows in which light ambience the selected lamps are used and their values can be changed.

2.) Light object - Tracking
The values of the selected lamps are displayed for all light objects in the order in which they appear in the timeline. So you can see when which lamp is used in the show. Apart from the light ambiences values, the individual object settings can also be changed.

1.) Light ambience-Tracking

The values of the individual light ambiences are displayed for all selected lamps.
If the dimmer of a lamp is off (dimmer value = 0), the corresponding table cell is empty..


DeviceSceneTracking

The table cells contain the values of a lamp (column) in a light ambience (row).
By clicking on one of the tab cells, the values of the lamp for the ambience are displayed.
These values, the lamp / light tuning, can now be changed numerically or by copying.
The changed values are accepted after clicking Save 
Save.
Click Cancel 
Cancel to discard the changes.
The other buttons are:
Button_TimelineSelectionIf a light (row) is selected, all the objects in the timeline are selected, which use this light tense and the timeline is brought into the foreground.
Button_Copy Copies values from other light ambience / lamps - see below.

a) Numerical changes:

Since all controllers are designed for two bytes, the TextMask TextMask displays the percentage value, the total value, the higher byte value and the low byte value.
The values can be changed, (total value = higher byte value * 256 + lower byte value). The total value is calculated when the return key is pressed or if the text field loses the focus.

Note:
If the lamp has only one DMX channel for the property (ie only one byte), the higher-order byte value always counts and the low byte value is neglected!
For lamps that have two DMX channels, both byte values are taken into account.

b) Change a property using the quick selection

By clicking on the square box above the values, a list opens in which discrete values can be selected.

QuickSelection

c) Copy values:

Click the tab cell whose values you want to change. By clicking on the Copy button Copy, the copying mode is activated and the mouse pointer changes. If you now click with the mouse in another table cell, the values from this table cell are taken over.

To copy only one property, use the copy buttons just below the displayed property. If you want to copy all values, use the copying button on the left side of the window.
For explanation:
The program recognizes which values can be copied on the basis of the lamp definition. A function type such as dimmer, extra color, ... was assigned to each controller in the lamp termination. It may be that the same type of function as, e.g. "Shutter", but the controllers were equipped differently, because the lamps behave somewhat differently. In this case, the values are copied, but a blue question mark appears instead of a hook.

d) Rename lighting ambiences

You can change the name of a lighting scene by double-clicking on it. Press the Return key or click in another cell to complete the renaming.

2.) Light object-Tracking

The Timeline contains light objects and scene transitions. Each light object is assigned a light ambience.
The Lamp Tracking - Light Objects window shows the light objects, their assigned 
light ambience and the setting of the respective lamp.
The order from top to bottom corresponds to the order in the Timeline from left to right.

DeviceObjectTracking

This table shows for all selected lamps their use in all light objects of the Timeline.

The first column lists the scene transitions and light objects.
The second table column lists the light ambiences of the light objects.
For each lamp, there is an additional column that lists the lamp settings. If the lamp is off at this point (dimmer value = 0), the corresponding table cell is empty.


The presentation in detail

Objectposition

Object A is located between MainBridge1 and MainBridge2.
The exact position and length of object A is represented by 
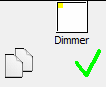
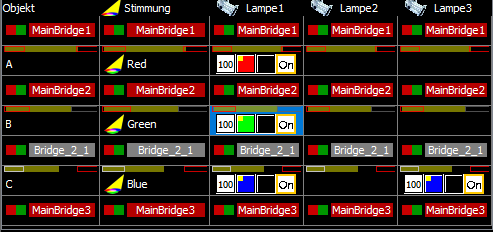
. The red frames represent the main scene bridges, the grey frames represent the 'normal' scene bridges.
With Object C you can see that the object does not reach all the way to MainBridge3.

The Lamp1 column displays the lamp settings of Lamp1.
In the Object B row, first the object name 'B' is displayed, then the name of the assigned lighting scene 'Green'. In the following columns you can see the setting for each lamp in the assigned light ambience.
The settings of lamp1 for object 'B' - lighting scene 'Green' can be seen in the table cell highlighted in blue .

Special: a light object extends over several scene bridges

In this case, the object is displayed in several rows in the table. For identification purposes, the background is yellow and the object is displayed with yellow arrows at the end and at the beginning.
ObjectPositionOverlap

When clicking on a table cell , the complete setting of the corresponding lamp is displayed below the table.
As described above for Light Ambience Tracking, you can change the lamp properties.


Please note:
Changing lamp properties, such as dimmer value, color, etc., always affects the light ambience, which can be used in several light objects. So this change may affect several light objects.
Whereas the changes to object properties such as fade times, disable channels, etc. always affect only one selected light object.


The buttons:
ObjectSettings 
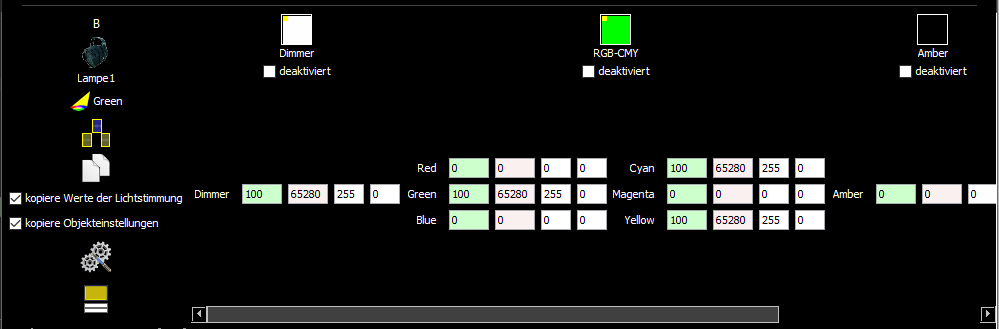
Opens the object settings for the selected object (table row)
Here the object settings (for all lamps) can be changed.
Copy Enables / disables the copy mode.
In contrast to light ambience-tracking, the object settings can also be copied here.
If the copying mode is active, the mouse pointer changes and you can click on a different table cell to copy the values from there. The light 
ambience values and / or the object settings can be copied.
CopySettings Here you can set what is taken into account during a copying process,
either values of light ambiences or object settings or both.
ShowObjectSettings 
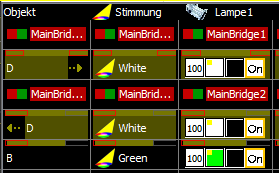
Opens and closes the detail view of the object settings. In addition to the light ambience values, the object settings for the selected object and lamp are also displayed.
Save The current changes are accepted
Cancel The current changes are discarded

The object settings are explained in detail in object settings!