Menü: ( DMX Light) -> (
 View DMX Effects)
DMX Light) -> ( View DMX Effects)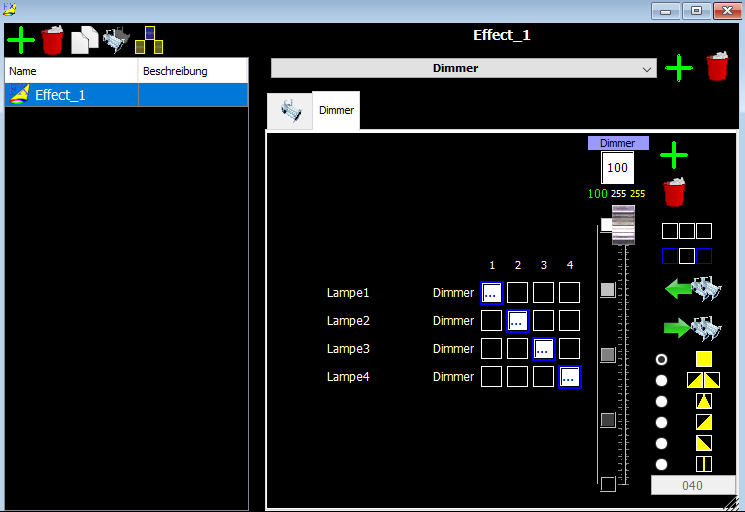 DMX Light) -> ( View DMX Effects)
 .
. |
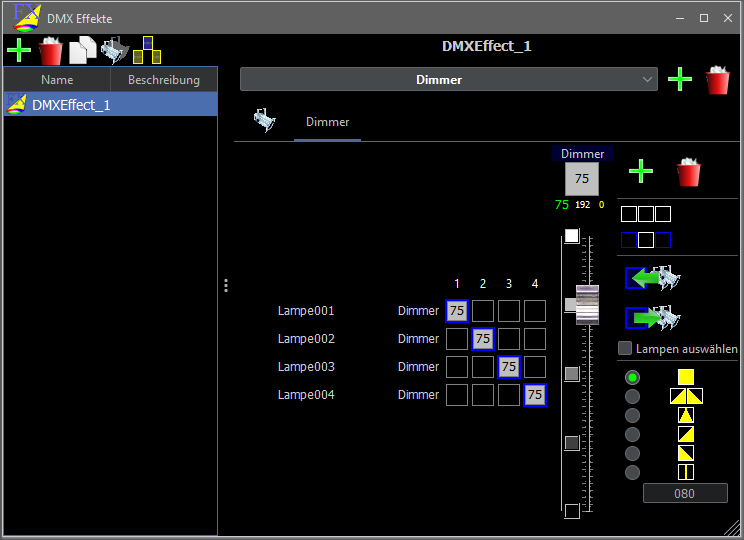
A new DMX effect is generated. |
 |
A selected DMX effect is deleted. If this effect is used in any light object, a security prompt appears. Otherwise it will be irrevocably deleted. |
 |
A selected DMX effect is copied. |
 |
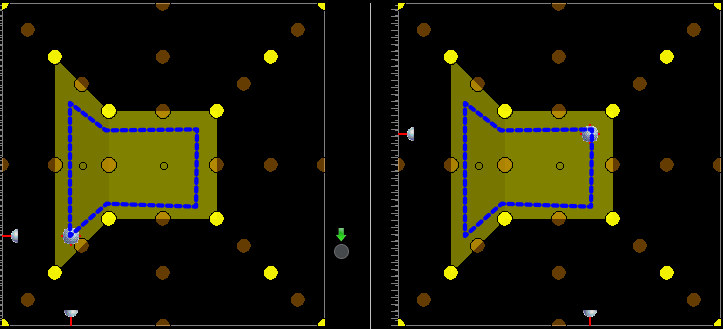
In the DMX Stage View, only the devices used in the selected DMX effect are displayed. |
 |
All light objects are selected in the timeline using this DMX effect. |
 (right section).
 |
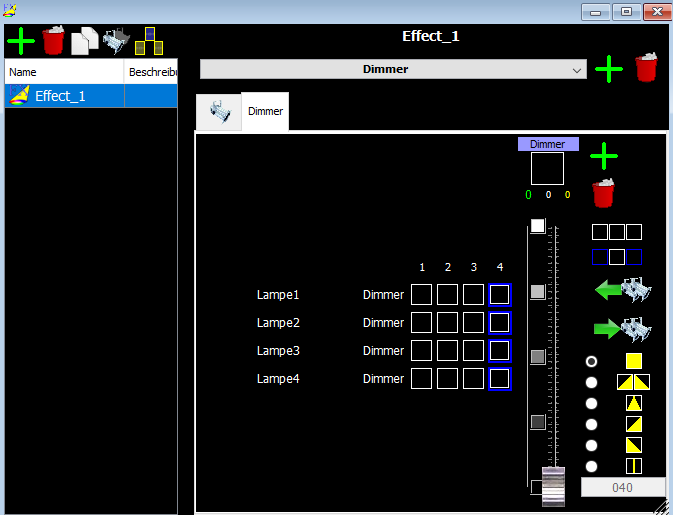
Adds to the DMX effect all the devices selected in the DMX stage view. The order corresponds to the order of the selection. |
|
Deletes a selected device from the list. (Clicking on a device in the list will select it). |
| Moves a selected device up one position. | |
| Moves a selected device down one position. | |
 |
Inverts the order of the controls of a selected device - see 'Add function'. This can be used if a device is installed upside down and has several controllers for a functionality. For example, if an LED bar is installed reverse, the order of the individual controllers can be inverted. |
 .
.
 .
.
|
The function selected in the list is added to the DMX effect. |
|
The function selected in the list is deleted from the DMX effect. |
 .
.
|
A new step is added |
|
The last step is deleted. |
| Clear the selection. | |
 |
Invert the selection. |
 |
Instead of setting the
value via the right slider, the corresponding values can be taken over
from the current setting of the devices for the selected boxes. Trick: The slider on the right does not send any values to the devices. In the DMX stage view, however, you can set the devices to the desired values and then click on  to accept them. This may be interesting, e.g. Positions of scanners or movingheads. to accept them. This may be interesting, e.g. Positions of scanners or movingheads. |
 |
All selected values are sent once to the devices. |
 |
If this is selected, the lamps in the stage view are automatically selected according to the selected steps. |
| The different behaviors in the individual steps - you should play around with these possibilities | |
 |
When a step is started, the corresponding value is set for the duration of the step. |
 |
The values are faded from one step to the next. (This is recommended for scanner moves). |
 |
The values are faded in and out inside one step. |
 |
At each step, the values are faded in inside one step. |
 |
At each step, the values are faded out inside one step. |
 |
The value is set only briefly (Flash) in the middle of the step. The duration can be set in the text field. |
to apply the values set in the stage view for the selected steps..


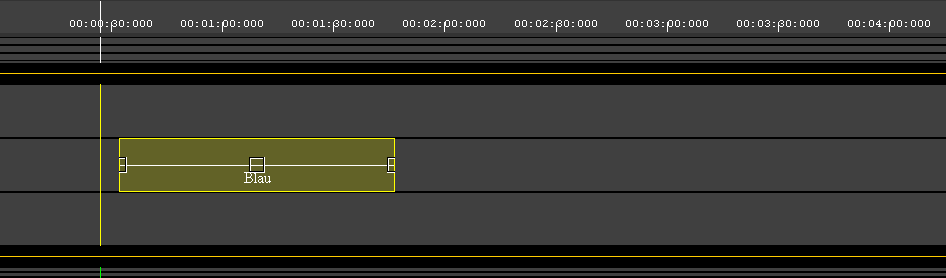
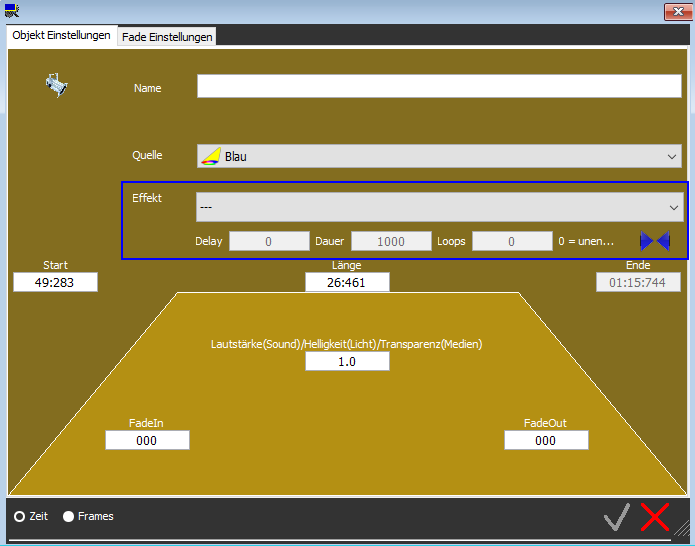
| Delay | Here, a delay time can be specified until the effect starts. This is especially interesting when certain values of a device have to beon for long (for example, the pilot flame of a flame light). |
| Dauer | Here the duration of an effect is indicated, namely the duration for a run through all steps. |
| Loops | Here, the number of passes can be entered. The value 0 means that the effect is continuous. If another value> 0 is specified, the effect is repeated as often. At the end of the last run, the devices then adjust themselves as indicated in the associated light ambience. |
 |
If you enter loops and you want the light object to stop exactly with the last step, you can use this button to adjust the length of the object to the effect. |
 to accept these settings.
 or is
specified, the light ambience is already faded in the last step.
or is
specified, the light ambience is already faded in the last step.| Here you can change the delay (delay) of the effect. Attention: this field is located exactly under the area with which the start of the light object is changed. You should enter a different value for the delay in the object settings (double click on the object). Then this button slides into an area which is reachable with the mouse. |
|
| Here you can change the duration of the effect, by holding down the left mouse button on There are three such areas:
|
 in the DMX
effect to apply the values.
in the DMX
effect to apply the values.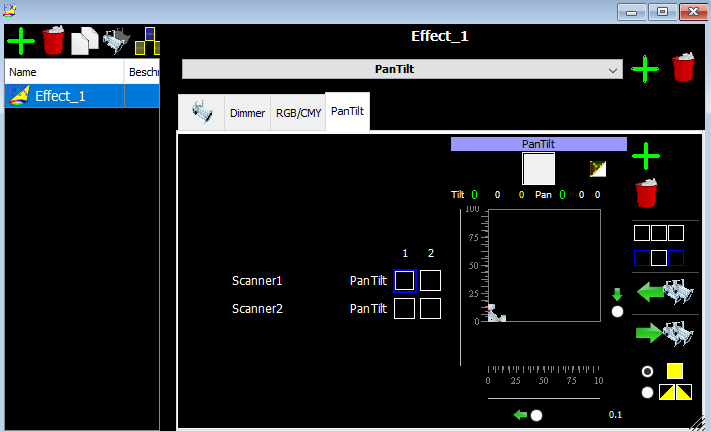
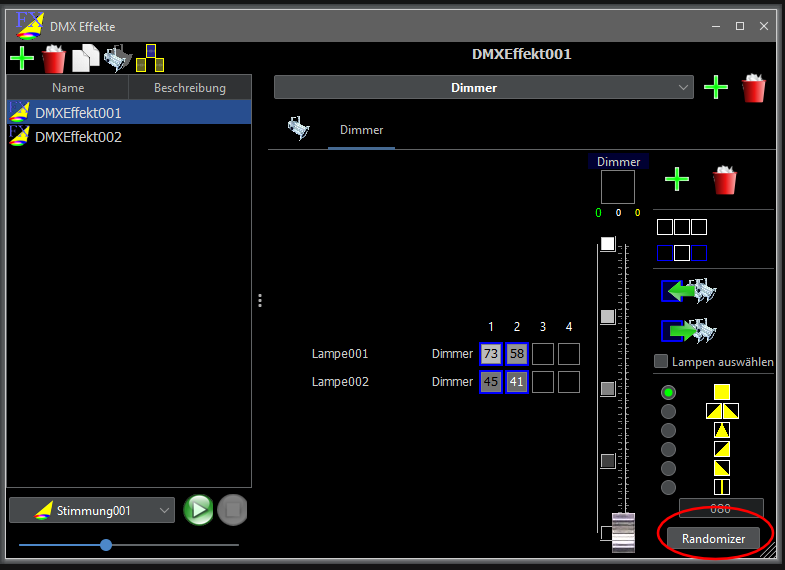
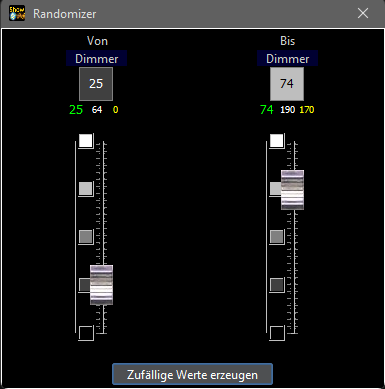
 generates random values within the defined value range for all selected steps of the DMX effect.