 Settings) -> ( Program Settings)
Program Start
Program End
Automatic Backup
Expert Settings
Tips
OSUser with admin rights
Boot without login
Autostart liveShow Software or LiveShow_MediaServer Software
Boot without login
Autostart liveShow Software or LiveShow_MediaServer Software
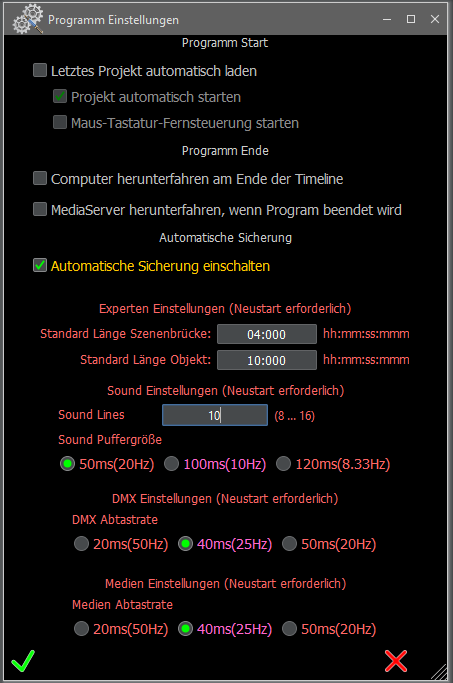
Program Start
| Automatically load last project | If this is selected, the last used project is automatically loaded when the program is started. |
| Start the project automatically (Only active if previous point is selected) |
The last used project will start automatically (played). |
| Start mouse keyboard remote control | The global mouse keyboard remote control is startet. A message window appears in which you can exit the global mouse remote control again. In order to be able to work with the liveSHOW software normally again, you must first close the global remote control again. 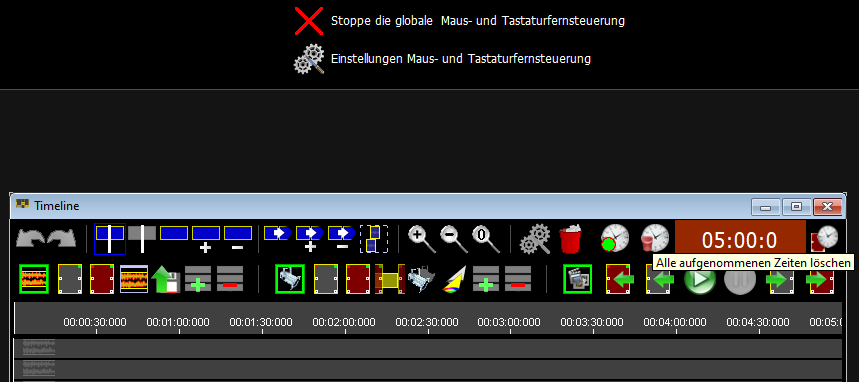 This only applies to remote control via a mouse or keyboard. Remote control via DMX inputs always works. See also:  Remote control settings (mouse, keyboard, DMX) Remote control settings (mouse, keyboard, DMX) DMX Input Settings DMX Input Settings |
Program End
The following settings are currently only available under Windows| Computer shut down at the end of the timeline | If this is
selected and all playcurs (sound, light, media) reach the end of the
timeline, the program is automatically terminated and the computer is
shut down. Caution: You should use this function carefully.
|
| Shut down Mediaservers when program is closed | If this is
selected, all connected LiveShow_MediaServer programs are terminated and
their computers are shut down. Caution: You should use this function carefully.
|
Note: If both options are selected, the computer and all computers with connected LiveShow_MediaServer programs will shut down as soon as all playcorders have reached the end of the timeline.
Note: If one of the two options is selected, the setup window will be displayed at each program start. This is to remind you that the computer is not accidentally shut down.
Automatic Backup
| Switch on automatic backup | If this is selected, a temporary backup of the project is saved at regular intervals (approx. 2 min). The project is not saved directly, but a copy of the project is saved in an extra folder. (under Windows: C:\User\YOUR USER NAME\.LiveShow\Backup) (under Mac: Users/YOUR USER NAME/.LiveShow\Backup) This has the following effects:
Notes: To save resources, no backup is performed while the timeline or a jingle is running. The liveSHOWsoftware should be started on a computer if possible only once!!! The automatic backup is a tool for emergencies and it can not be guaranteed that it always works in 100% of the cases. |
Expert Settings
| Default Length Scene Bridge | Here you can enter a length that will be used for newly created scene bridges. Format: hh:mm:ss:mmm - Hours:Minutes:Seconds:Milliseconds After changing the length, press the Enter key. |
| Default Length Object | Here you can enter a length to be used for newly created objects (light, images, text). Format: hh:mm:ss:mmm - Hours:Minutes:Seconds:Milliseconds Note: Sound or video objects already have a fixed length when they are created. After changing the length, press the Enter key. |
(The program must be restarted for the following changes to be applied)
| Sound Lines | Here you can change the number of sound lines. After changing the number of sound lines, press the Enter key. Sound lines are created internally by the program. A sound object can be assigned how its sound channels are distributed to the sound lines. And a sound card can be assigned which sound lines are played on which output channels. This is similar to the busses of a sound mixer. Attention: The number of sound lines and the assignment of channels of a sound card to sound lines is a program setting and not a project-dependent setting. Whereas the assignment of channels of a sound object to sound lines is a project-dependent setting. If you export a project and load it on another computer with a lower number of sound lines, the higher sound lines will not be taken into account. If you save the project on the other computer, the assignment of channels of a sound object to the higher (not existing) sound lines will be discarded. |
| Sound buffer size | Currently this setting has no effect due to the introduction of the sound lines! This setting is only available for possible future changes. |
| DMX sampling rate | When playing, the timeline (fade in/out of objects) is scanned in small steps. At each sampling step, the changed DMX values are transmitted to the DMX interface. Here you can set the step size (sampling rate).
|
| Media sampling rate | When playing, the timeline (fade in/out of objects) is scanned in small steps. At each sampling step, the fade values are sent to the media server (via network), which then rebuilds the image. Here you can set the step size (sampling rate).
|

